
A tiled backsplash behind your stove is not only practical, but also a beautiful way to add character to your kitchen. And the best part? You can absolutely do it yourself. With a little preparation and attention to detail, you can create a stunning Dutch Tile backsplash in just one afternoon.
Follow this step-by-step guide to build a kitchen wall with personality.
What you'll need
- Your favourite Dutch Tiles
- Tile adhesive
- Grout
- Caulk (preferably clear or matching your grout colour)
- Drop cloth or plastic sheeting and painter's tape
- Spirit level or laser level
- Pencil
- Sponge and cloth
- Grout float and notched trowel
- Tile spacers (optional)
How to create your own Dutch Tile backsplash
Step 1: Prepare the surface
Make sure the wall you'll be tiling is clean, grease-free and completely dry. Depending on the surface, you may want to lightly sand it or apply a primer for better adhesion.
Step 2: Plan your layout
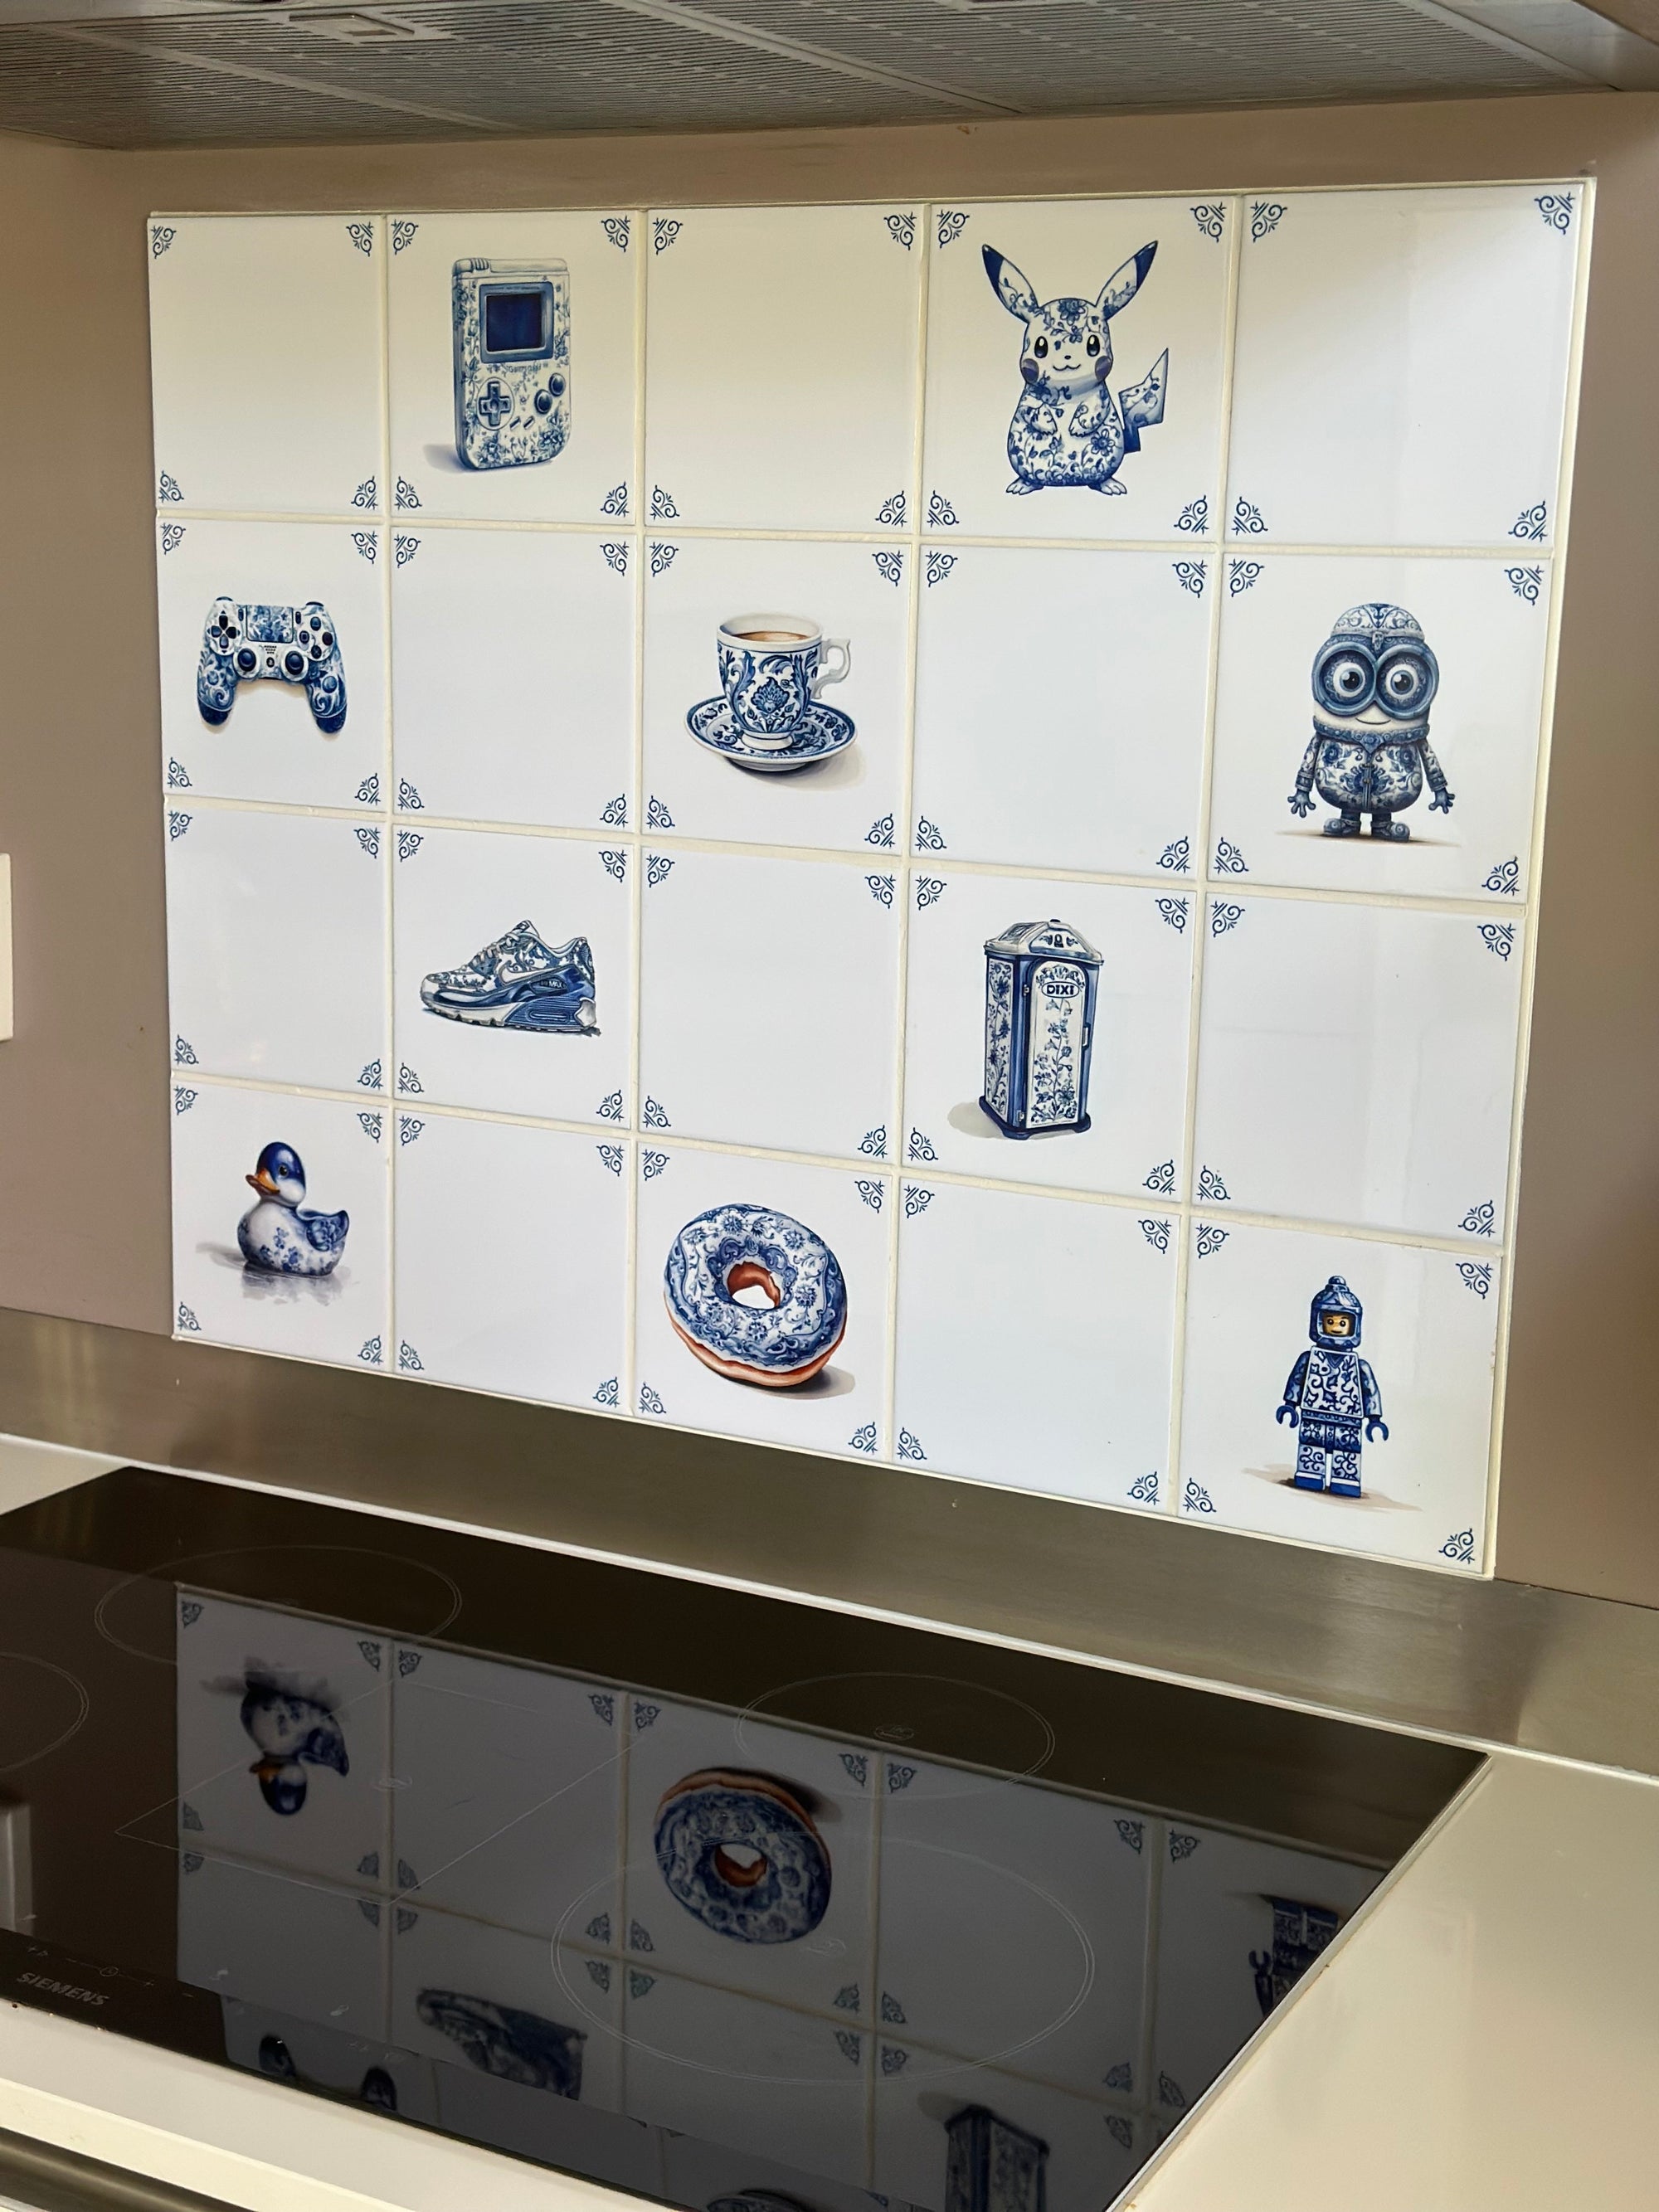
Plan out the look for your backsplash. Lay the tiles out on a flat surface to determine the order and positioning. This ensures everything ends up in the right place. We went with a simple checkerboard pattern using 15 tiles: 8 Dutch Tiles with illustrations and 7 plain ones with decorative corners.

Step 3: Mark your starting line
Use a spirit level or laser level to draw a straight baseline for your first row of tiles. Mark the edges with pencil directly onto the wall. This line will guide the rest of your design.
Step 4: Protect your workspace
Use masking tape and plastic sheeting to cover everything around your working area. You really don't want tile adhesive on your stove or countertop.
Step 5: Apply the tiles
Apply the adhesive on the back of the first tile using a notched trowel. Carefully press it onto the wall, aligning it with your pencil guide. Continue placing the tiles one by one, checking with the level to keep things straight. You can optionally use tile spacers to ensure all grout lines are the same width.
Step 6: Let it dry
Follow the instructions and let the adhesive dry. Usually, this takes at least 12 hours. Avoid touching the wall while it sets. You can cover the area with plastic and tape if needed.
Step 7: Grout the tiles
Once the adhesive is dry, it's time to grout. Again, make sure the area is protected. Use a rubber grout float to spread the grout across the tiles, pressing it firmly into all the gaps. Wipe off the excess with a damp sponge before it dries.
Note: try to avoid getting grout on the surface of the tiles as much as possible.
Step 8: Seal the edges
Neatly finish the edges of your backsplash with caulk. Pay attention to the seams near the countertop, sides and top edge. This gives your wall a clean look and protects it from moisture, grease and dirt.
Step 9: Let it cure completely
Let everything dry and harden according to the instructions on your grout and sealant. After that, your backsplash is ready to shine.

Inspiration for writing this blog by Maud Kiens (Instagram: @Maudkienss)
A DIY backsplash with Dutch Tiles is a true eye-catcher that you'll enjoy every single day. It's not only functional but also adds a personal and unique touch to your kitchen. We chose a checkerboard-style pattern, but the possibilities are endless. You might go for a Dutch Tile border with a plain centre, or go all out with a playful wall full of colourful illustrations.
Want to create your own? Take a look at our Dutch Tile collection and start building your own kitchen story.

