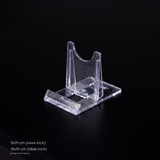


There are many ways to display our Dutch Tiles in your home. Of course, you can display them with one of our tile stands, but there are more creative ways to give them a special place in your home. With this DIY guide, you can easily turn your favourite tiles into a beautiful framed piece of tile art. In just a few simple steps, you’ll create a one-of-a-kind art piece that deserves the spotlight.

🛠 What you'll need
- Your favourite Dutch Tiles (set of 4)
- A (deep-set) photo frame with passe-partout
- Measuring tape or ruler
- Pencil and eraser
- Scissors
- Masking tape (painter's tape)
- Strong double-sided adhesive tape (we used Powerbond by Tesa)
How to make a Dutch Tile Frame
Craft time: approx. 10 minutes
Watch the step-by-step video here.
Step 1: Find the centre of your frame
Take the frame apart and use the back panel as your canvas. Measure the height and width (within the passe-partout) and mark the centre with a pencil. Do this from both directions and draw a cross where the lines meet. This gives you an exact centre point.
Step 2. Decide where your tiles will go
Lay out the tiles in the position you want them. Use masking tape to create a simple guide along the outer edges. This will help you place the tiles straight. Once you’re happy with the layout, erase the pencil mark in the centre.
Want the tiles placed tightly together without spacing? Then you can skip step 1 and 2.
Step 3. Apply the tape to your tiles
Cut small squares of the double-sided tape and stick four pieces to the back of each tile, one on each corner. Peel off the protective backing and carefully place the tiles inside the frame where you want them.
Tip: use strong but removable tape so you can switch out the tiles later. Remember, every first Thursday of the month is Tile Drop Thursday and we drop our new designs. Who knows, you might have new favourites soon. 😉
Step 4. Final touches
Press down firmly on each tile and remove the masking tape guide.
Step 5. Put the frame back together and hang it in your favourite spot.
Ask a housemate, friend or parent to help you hang. If you can’t drill into your wall you can use the same double-sided adhesive tape as an alternative.
Heads up: if your frame includes a glass front, it might not fit anymore once the tiles are inside. Don’t force it, as the glass could break. This DIY also works beautifully without the glass panel.
Dutch Tiles make the perfect gift
Your Dutch Tile Frame is ready. It’s a real eye-catcher for your home and also makes a great gift. Create a themed frame for a coffee lover with tiles like the Espresso Machine, Latte, Espresso and Croissant. Or design a gift for the adventurer at heart with tiles like the Landrover Defender, Afrika, Elephant and Camera. 
Looking for something more personal? Mix four tiles with square photos or polaroids for a truly unique and meaningful gift.
Of course, our tiles also make amazing gifts on their own. Check out the full Dutch Tile collection!
Inspired by our creative customers
This DIY was inspired by the amazing creations we’ve seen from our community. We love seeing how you use our tiles in your own way. Have you made something special with your Dutch Tiles? Share it with us and your project might be featured in a future DIY.
Want more ideas? Follow us on Instagram and sign up for the newsletter.